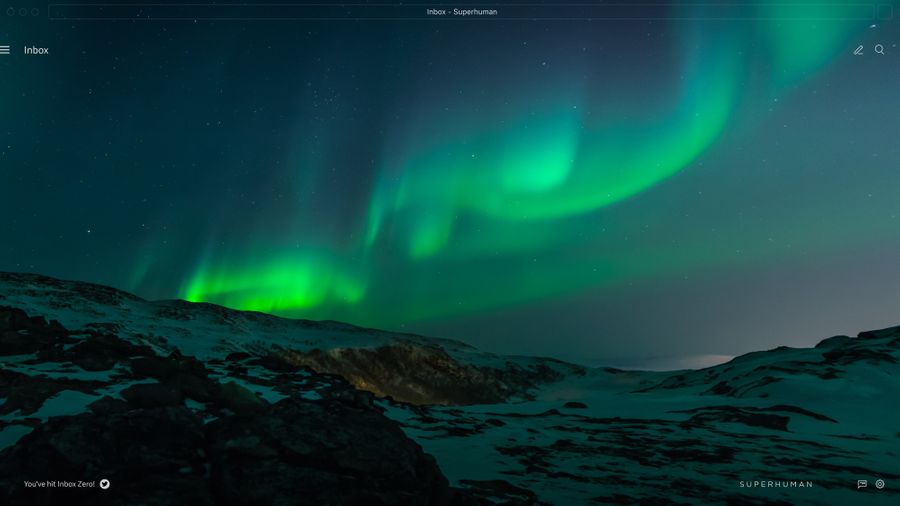
In Superhuman, one shortcut rules them all: Cmd+K.
Cmd+K brings up Superhuman Command, where you can instantly do any action — and also learn the shortcut for next time.
Command palettes are incredible tools, and their speed and versatility transform users into power users. But what are the secrets to building a powerful, omnipresent, and blazingly fast command palette?
Whether you already have a command palette in your product, or you're starting from scratch, this is our guide...
Anatomy of a command palette
What is a command palette, exactly?
A command palette is a user interface (UI) element that gives users quick access to many commands. It's usually a free-form input field that helps users find an action by narrowing down a list, based on what they type.

You'll see command palettes in Superhuman, of course — but also in Sublime Text, Alfred, Figma, VS Code, Slack, Linear, Vimcal, and many, many more. (For a little history, see this fantastic article by Matthew Guay.)
Why your product needs a command palette
A well-built command palette is immensely powerful.
You can build limitless features. With a command palette, you can build — and your users can discover — features that could never warrant a button or a dropdown. You aren't limited by screen real estate, so you can avoid cluttering the UI.
Users can quickly and easily discover new features. With a command palette, users can simply type what they want to do. Users prefer search to menus, which are only helpful if they understand the way your menus are organized.
Users don't need to take their hands away from the keyboard. With a command palette, keyboard shortcuts are easy to discover and explore. This helps users unlock extreme speed and achieve a magical state of flow.
Without a command palette, keyboard shortcuts don't leave room for mistakes. Ever pressed Cmd+Shift+W, instead of Cmd+W, and closed all your tabs by accident? (By the way, Cmd+Shift+T will bring them back!)
How to build a remarkable command palette
When you have a great product with a healthy feature set, the benefits of building a command palette are enormous. Here's how to do it…
Rule #1: Make your command palette available everywhere
Wherever your user is in your app, they must be able to bring up the command palette by using the same keyboard shortcut.
To achieve this, first pick a keyboard shortcut that is simple, memorable, and doesn't clash with regular typing or common shortcuts — like Cmd+C for copy, Cmd+V for paste, or Cmd+S for save. (Though you may need to make a tradeoff… more on that later!)
For example: Cmd+K is used by Superhuman, Linear, and Slack; while Cmd+Shift+P is used by Sublime and VS Code.
Next, make your command palette available everywhere by following these steps:
- Capture keyboard events with an ad-hoc event listener, or by using a library dedicated to it. We use Mousetrap.
- Bind Cmd+K (or whichever shortcut you picked) at the top-level of your application, and let your command palette appear and take focus.
- Ensure the command palette not only appears but disappears when the user presses the shortcut. This lets the user easily change their mind, go back to their task, and restore their focus. Practically speaking, that means that you need to keep track of the element that was focused before the user pressed the shortcut. (Focus management is highly dependent on how your application is built — learn more in this great post on Ad Hoc.)
- Consider how that element will appear consistently in all screens. The simplest way is to show the command palette in its own layer on top of everything else — similar to how you'd show an alert.
Exceptions to the rule
Of course, there are always tradeoffs!
You might need to trade availability for simplicity.
You may not be able to make your command palette's shortcut work in certain contexts — and sometimes, that's totally fine.
For example, in Superhuman, hitting Cmd+K from the Settings dialogs doesn't do anything. These dialogs are rarely used, and users can easily exit by pressing Esc.
In our case, the dialogs obscure most of the app, and there are few enough actions you can perform in them that we just use visible UI elements instead.
You might pick a shortcut that is already used elsewhere in your application.
If so, we suggest that hitting the shortcut a second time brings up the command palette.
For example, many text editors use Cmd+K to create a link — in Superhuman, we change what Cmd+K does in the editor to do what people expect. Press it once, and you see the UI to insert a link; press it again, and you see the command palette.
By now, you have a keyboard shortcut that both brings up and dismisses your command palette.
Next, you must make your command palette central and powerful!
Rule #2: Make your command palette central
Putting everything in one place simplifies the mental model of your app.
Your command palette must be the one place where users can find every command. In other words, you shouldn't use Cmd+K for some types of actions, and Cmd+P for others.
Of course, your typical UI elements — such as buttons, dropdown menus, etc. — should continue to exist! But the palette also lets you build features that would never warrant a button or a dropdown, and adds a layer to access the same actions faster — without ever needing to touch the mouse.
How to do this:
- This depends heavily on how your app is architected, but in essence: ensure you decouple execution of commands from the UI presented.
- Architect your code so that you can add commands from any part of your codebase. This keeps all related code in one place, and encourages you to have commands for everything you can do.
Rule #3: Make your command palette omnipotent
Now, make your command palette powerful by giving users access to every possible action!
A palette that only gives you access to a small set of commands is not very useful. You want your user to default to the palette for anything they need to do.
How to do this:
- Make it easy to add these commands from anywhere in your codebase. In particular, if you have a central way to handle keyboard shortcuts (like with Mousetrap), you can extend it to define both a shortcut and a command at the same time.
- More importantly, from a product designer's perspective, when designing a new UI, think of the corresponding commands. What should they be called? How do they differ from the action triggered by the new UI elements?
- For example, in Superhuman you can drag-and-drop an image into a draft to make it an attachment or an image embedded in the message itself. We also have both as commands:
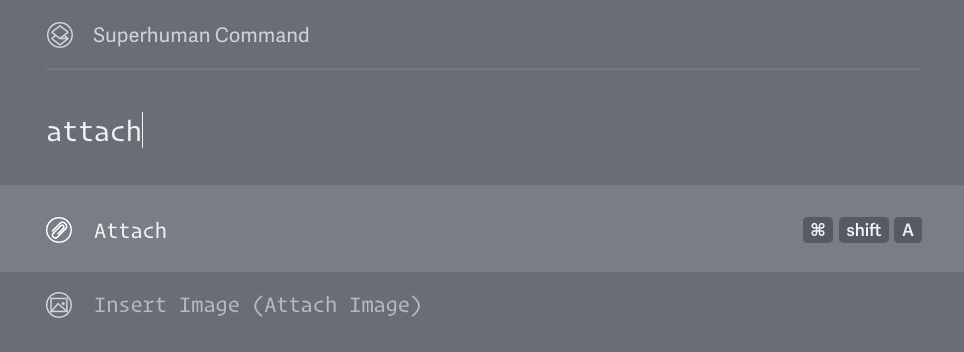
Over time, it should become a reflex for product owners and engineers to see any action as a UI element, a keyboard shortcut, and a command.
You can also use design to convey a sense of power.
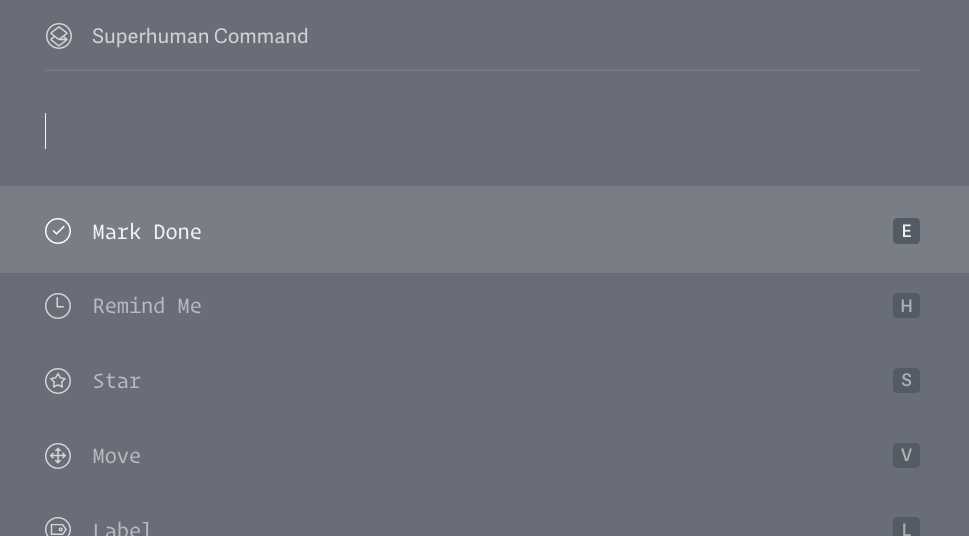
- Command palettes should be visually imposing. Superhuman Command shows up right in the middle of the screen, and covers a large part of the app. It shows 5 different commands, and if you scroll you can see many more. We use an elegant monospaced font to evoke the feeling of directing a powerful machine.
- Command palettes should invite further exploration. In Superhuman, the last command is intentionally cut off — to imply that there are more things below the fold.
- Each command should have its own icon. This makes the palette more visually interesting, and also differentiates commands. It's a subtle hint that you can do a wide variety of actions. It also teaches users what to look out for on mobile, where there's only room to show the icon.
By now, you have a command palette chock full of commands that can be called from anywhere in your app! The user has an enormous amount of power at their fingertips. It's time to make it easy for them to unleash it…
Rule #4: Build flexibility into your command palette
When the user types something, you want to filter the commands that match — but you must be forgiving.
Naturally typing "open" all lowercase should match "Open", but so should "opn" or "oepn".
How to do this:
Let's say you start with a simple list of commands, with only a title like so: (JavaScript, but essentially pseudo-code).
function getCommands (query = '') {
const commands = [
  { title: "Open Link" },
  { title: "Mark Done" },
  { title: "Copy Page Link" }
]
return commands.filter(command => command.title.includes(query))
First, you'll want to ignore the case:
return commands.filter(command => command.title.toLowerCase().includes(query.toLowerCase()))
At this point if you type "link", you'll get "Open Link" and "Copy Page Link", but if you type "lnik", you'll get nothing. You need fuzzy string matching.
We use our own library called command-score. Our fuzzy matching library gives us a score between 0 and 1 that represents how well a given string of text matches another. Just filter out the ones that don't match enough, like this:
return commands.filter(command => commandScore(command.title, query) > 0.0015)
You can adapt the threshold to what works best for you.
Then, you'll want to add synonyms:
Whenever you define a new command, think of alternative words and phrases your users might use to action the command.
Your user may not know the specific terms you use in your product. For example, some Superhuman users are more accustomed to "archive", while we prefer "mark done". If they type "archive", they should still find what they're looking for.
When we filter out commands, we fuzzy-match against both the command's title and aliases. The command's score can be the maximum score across all of these.
Practically speaking, we have something like this:
const commands = [
  { title: "Open Link", aliases: ['Open Attachment', 'Open File']  },
  { title: "Mark Done", aliases: ["Archive"] },
  { title: "Copy Page Link", aliases: ['Copy URL', 'Copy Location'] }
]
For a single command, you can define the score as:
const scores = [title, ...aliases].map(s => commandScore(s, query))
const maxScore = Math.max(...scores)
Calculate that for all commands, and do the same filtering as before:
return commandsWithScore.filter(command => command.score > 0.0015)One design note: when typing "archive", the displayed command could be "Archive" (the matching alias), or "Mark Done" (the main title).
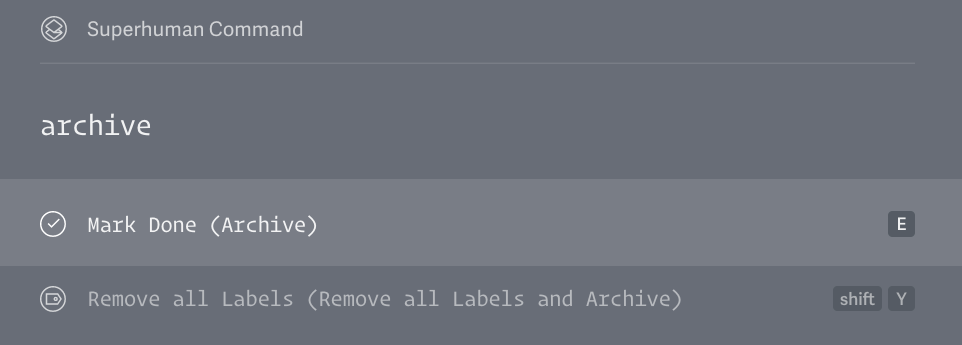
We decided to display the command as "<command title> (<matching alias>)".
- This reinforces our preferred wording, allowing us to reinforce our product philosophy. In this example, "Mark Done" elicits a feeling of satisfaction and completion… rather than "Archive", which evokes a feeling of endlessly accumulating email!
- This also makes it clear to the user why that command is shown, and helps them make a connection between their wording and ours.
- In addition, emphasizing our preferred wording helps the user when that wording is used in other contexts (e.g. help pages).
Then, ensure the suggestions are relevant:
Now you're showing only commands that match what the user typed — but we can still make them even more relevant!
Ideally, the top option is what the user is looking for. You won't be able to do it all the time, but you can influence the results and not rely only on fuzzy-matching.
You need to understand what the users are most likely to want to do for a particular query. Which commands are more important relative to each other? To decide that, you can rely on your own intuition about the features, or measure how often a certain action is taken compared to another.
Take our Snippets feature, which allows users to create and reuse templates incredibly fast.
If I type "snippet" in our command palette, it can match "Create Snippet", "Use Snippet", and "go to Snippets".
It seems fairly natural that a user would use a Snippet more often than they would create one, and they would visit the Snippets folder even less. You need a way to nudge the ordering to reflect that.
How to do this:
- First, give a default score to all commands. This is a great opportunity to highlight your product's most important, relevant, and enticing features. Find a balance between engaging the user and being practical: no need to put a cool but rarely-used feature at the top. This score will be used before the user types anything at all.
- Even though you want a lot of commands in your palette, it probably doesn't make sense to show all of them from the beginning. Just give those a default score of 0 and they will be filtered out.
- Once the user starts typing something, take the score we used to filter the commands and use it to sort them as well.
- Give each command a "scale". It's a number that will boost or dampen a command's score. When calculating the score, simply multiply it by that scale. A number above 1 will bring a command up, a number less than 1 will bring it down.
For example, in Superhuman "meeting" would match "Create Meeting" and "Meeting Link Settings", but the latter is less often used — leading us to cut its score in half.
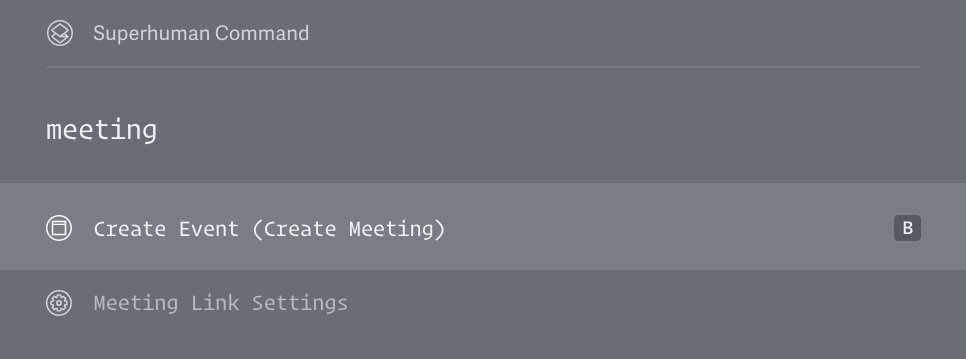
- Another way to ensure a particular command always ranks lower than another one is to give each command a unique ID and give them a list of other IDs under which they should always rank.
For example, you could define the above commands like this:
const commands = [
  { title: "Create Event", id: CREATE_EVENT },
  { title: "Meeting Link Settings", id: MEETING_LINK_SETTINGS, follow: [ CREATE_EVENT ] }
]
In your sorting code, when you compare 2 commands, you just need to check if one's ID is in the other's "follow". This way, no matter what the user types and thus no matter what the command scores end up being, you're guaranteed that the less important command will be lower.
These are just examples of the many ways you can make your ordering more relevant.
One whole category you could explore is adapting ordering based on usage over time. At Superhuman, we do a light version of this by keeping track of the last used item in some lists — for example, labels.
Rule #5: Make commands contextually relevant
The user shouldn't have to understand the intricacies of your product to know when a command is available and when it's not. This is why most commands should be available from everywhere.
However, there are commands that only make sense in certain contexts. For example, in Superhuman "Send", "Attach", "Discard Draft" can only do something if a draft is focused. "Add Zoom Link" can only be used for a new calendar event.
How to use the app context in your palette:
- Show and hide commands based on what's currently active. But, again, only hide commands that are fully irrelevant.
- Boost the score of certain commands. You can do that by making the various parameters from above (default score, scale, etc.) a function of the application context.
The specifics are highly dependent on your product. In our case, amongst other things, we consider whether the user is looking at a list of conversations or a single conversation.
Toolkit for creating a remarkable command palette
Command palettes allow users to move faster and become infinitely more proficient — no wonder they have seen a resurgence in popularity.
Our command palette is so central to Superhuman that we even made shirts to celebrate Cmd+K!
Thanks @Superhuman for the amazing swag! I will wear the shirts/socks with pride. PS... I'm sending out more @Superhuman invites this week! Email me at gabe@g2i.co if you'd like one https://t.co/IQLSRzndn9 pic.twitter.com/3Ko3D1mRW6
— Gabe Greenberg (@gabe_g2i) March 19, 2019
When building or improving your command palette, here are your most important takeaways:
- Make your command palette available everywhere. Your user must be able to bring up the command palette easily, using the same keyboard shortcut.
- Make your command palette central. Your users should be able to find every command in one place. In other words, don't use Cmd+K for some types of actions, and Cmd+P for others.
- Make your command palette omnipotent. Give users access to every possible action.
- Build flexibility into your command palette. When the user types something, filter the commands that match — but be forgiving.
- Make commands contextually relevant. Most commands should be available from everywhere, but some only make sense in certain contexts.