How to add read receipts in Gmail and Outlook

Learn how to add a read receipt in Gmail and Outlook. We cover step-by-step setup for Google Workspace, Outlook desktop, web, and mobile.

Key takeaways
- Gmail read receipts only work with Google Workspace accounts - personal @gmail.com addresses don't have access
- There's no read receipt option in the Gmail mobile app for iPhone or Android - you can only request receipts on the web client
- Outlook offers more flexibility with read receipts across desktop, web, and mobile (version 4.2437.0+ for iOS, 4.2439.0+ for Android)
- Recipients must approve sending a read receipt on both platforms, meaning you can never guarantee confirmation
- For reliable tracking without recipient consent, tools like Superhuman Mail offer read status tracking across all devices
You send an important proposal, a time-sensitive request, or a critical update - and then you wait. Did they see it? Did it land in spam? Are they ignoring you, or just busy?
An email read receipt in Gmail or Outlook can end the guessing game. Read receipts notify you when recipients open your messages, giving you the visibility to follow up at exactly the right moment.
The catch: Gmail read receipts only work with Google Workspace accounts (not personal @gmail.com), and recipients can always decline to send one. Outlook offers more flexibility but still depends on recipient consent.
This guide walks you through exactly how to set up read receipts on both platforms, what to do when they don't work, and better alternatives when native features fall short. Let’s dive in!
How to add a read receipt in Gmail
Gmail read receipts are only available for Google Workspace accounts. If you're using a personal @gmail.com address, you won't see the option - skip ahead to the alternatives section for solutions that work with any Gmail account.
There's also no read receipt option in the Gmail mobile app for iPhone or Android. You can only request receipts from the web client.
Looking to switch? Here are 7 Gmail alternatives.
Step 1: Enable read receipts in Google Workspace (admin required)
Before anyone in your organization can request read receipts, a Google Workspace administrator must enable the feature.
Log in to your Google Admin console:
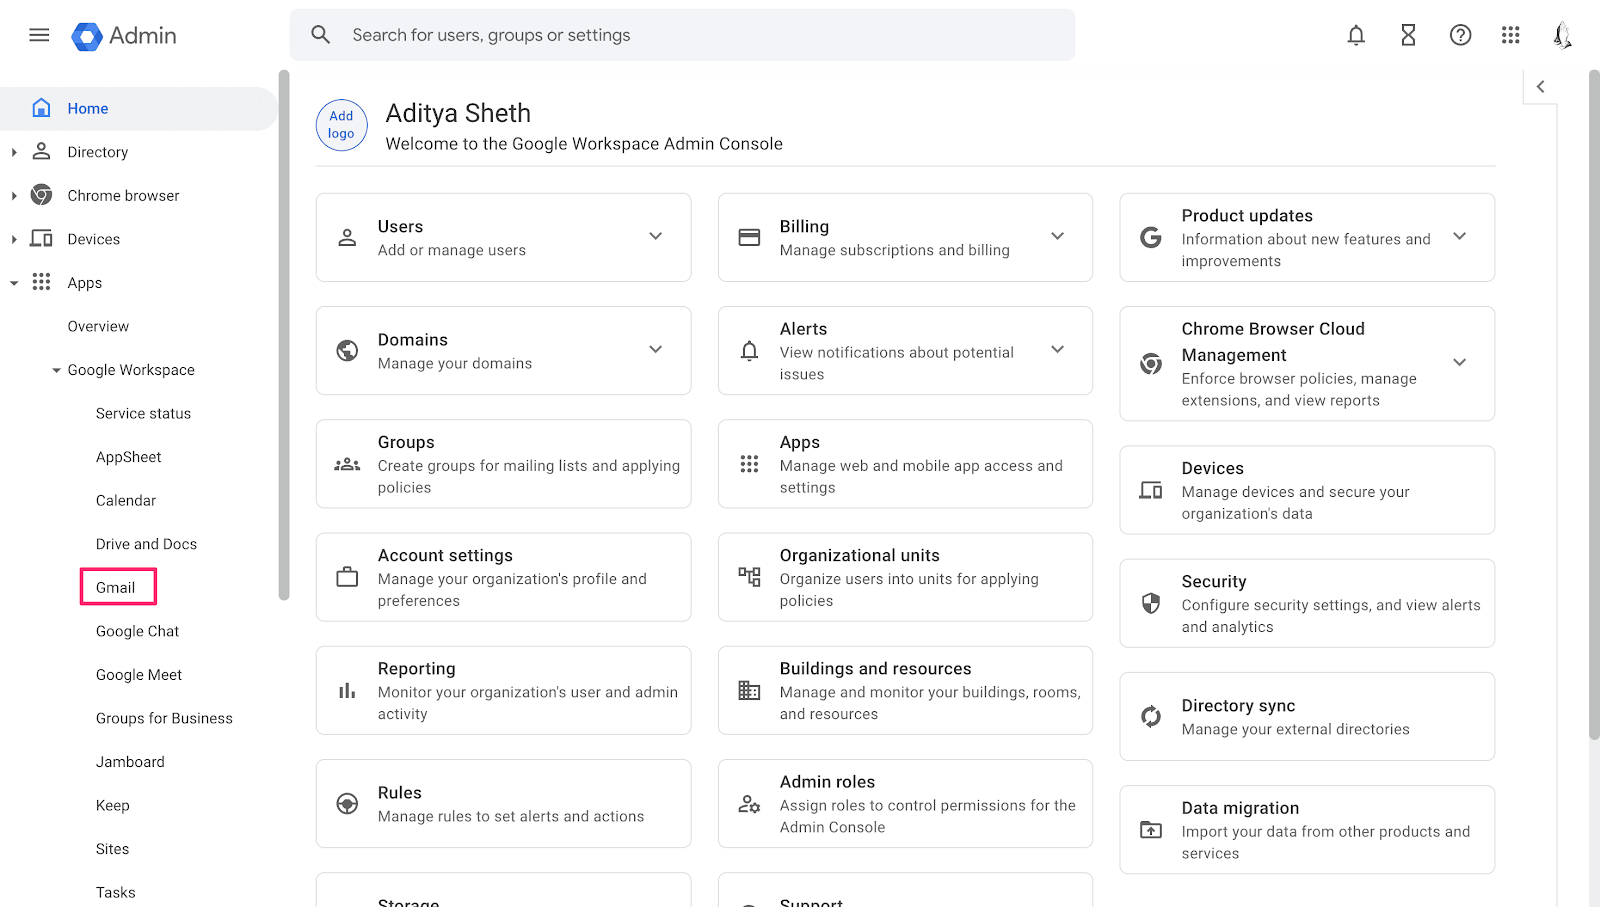
Navigate to Apps > Google Workspace > Gmail > User settings
Scroll to find Email read receipts. You'll see several options:
- Allow read receipts for all addresses: Anyone can request receipts when emailing anyone
- Allow read receipts within the organization only: Receipts only work for internal emails
- Allow read receipts to specific external addresses: Whitelist certain external domains
- Disable read receipts: No one can request receipts
Choose the setting that fits your organization and click SAVE.
Changes can take up to 24 hours to propagate, though most users see the option within a few hours.
Step 2: Request a read receipt when composing
Once your administrator has enabled read receipts, you can request them for individual emails. There's no way to enable read receipts by default for all outgoing messages - you must manually request them each time.
- Open Gmail and click Compose
- Write your email as normal
- Click the three-dot menu (More options) at the bottom of the compose window
- Select Request read receipt
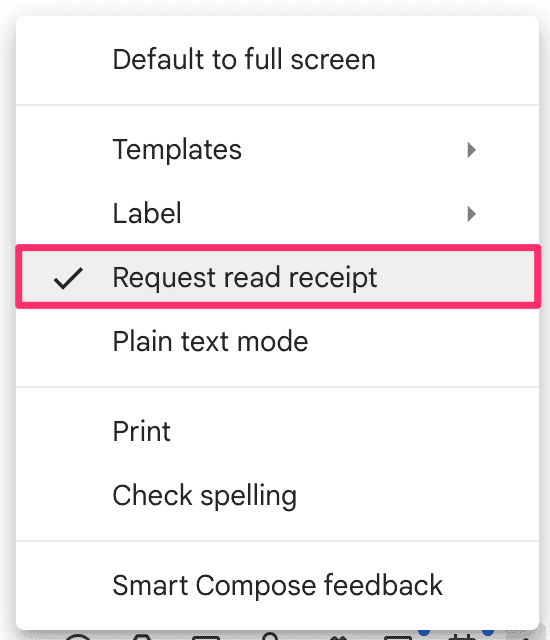
- Click Send
When your recipient opens the email, they'll see a prompt asking: "Send a read receipt to [your email]?" If they click "Send receipt," you'll receive a confirmation email. If they decline or ignore the prompt, you won't receive any notification.
Can you get read receipts on the Gmail mobile app?
No. If you're wondering how to get a read receipt in the Gmail Android app or how to tell if someone read your email on Gmail on your phone, the native feature doesn't support this. The "Request read receipt" option doesn't exist in the Gmail app interface for iPhone or Android.
If you need to track email opens from your phone, you'll need a tool like Superhuman Mail, which offers read status tracking across all devices.
How to add a read receipt in Outlook
Outlook offers read receipts across more platforms than Gmail, including desktop apps, web, and mobile. You'll need a Microsoft 365 or Exchange Online account.
You can request read receipts for individual emails or enable them for all outgoing messages (in classic Outlook).
Optional reading: 8 best Outlook alternatives.
Request a read receipt for a single email
- In a new email, go to the Options tab
- Check Request a Read Receipt in the tracking section
- Optionally check Request a Delivery Receipt to confirm it reached their server
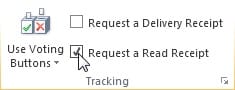
- Click Send
When your recipient opens the email, they'll see a prompt asking if they want to send a read receipt:
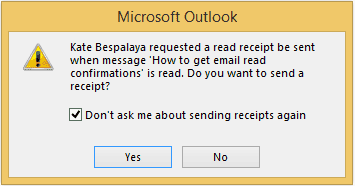
If they click Yes, you'll receive confirmation:
To view tracking status, go to your Sent Items folder, open the email, and click the Tracking button in the Message tab.
Enable read receipts for all Outlook emails
Unlike Gmail, classic Outlook lets you request read receipts for all outgoing emails automatically:
- Open File > Options > Mail
- Scroll to Tracking
- Check Read receipt confirming the recipient viewed the message
- Optionally check Delivery receipt confirming the message was delivered
- Click OK
Note: The new Outlook for Windows (rolled out in 2025) doesn't include global default settings. You'll need to enable read receipts manually for each message via the Options tab.
How to add a read receipt in Outlook Web
- Open Outlook and compose a new email
- Click the three-dot icon at the top of the compose pane
- Select Show message options
- Check Request a read receipt, Request a delivery receipt, or both
You've now enabled read receipts in Outlook Web.
How to add a read receipt in Outlook Mobile
Outlook mobile apps for iOS and Android support read receipts (requires app version 4.2439.0+ on Android or 4.2437.0+ on iOS):
- Compose a new email
- Tap the + button in the draft toolbar
- Select the Receipts icon
- Choose delivery receipts, read receipts, or both
- Send your email
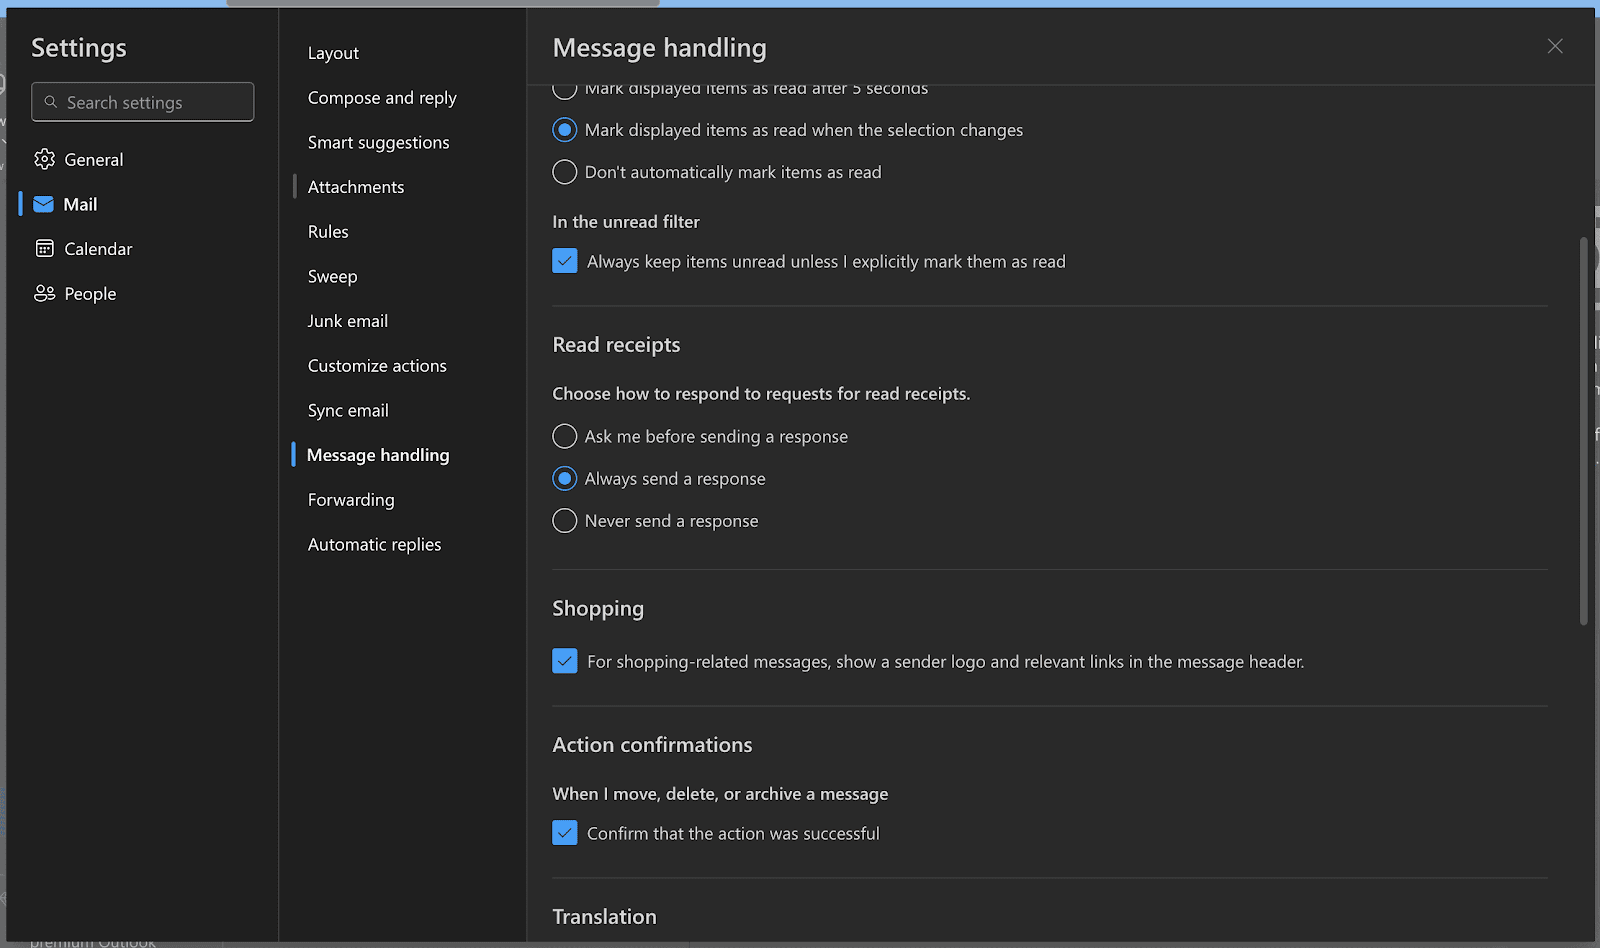
Configure how Outlook responds to incoming requests
- Open Settings > Mail > Message handling
- Find Read receipts
- Choose: always send, never send, or ask each time
Pro tip: Request read receipts selectively for important emails only. Recipients who occasionally receive requests are more likely to approve them.
Gmail and Outlook read receipt limitations
Both platforms have significant limitations that make read receipts unreliable for many use cases.
Gmail limitations
- Google Workspace only - personal @gmail.com accounts don't have access
- No mobile app support - iPhone and Android apps can't request receipts
- Recipients can decline - and many configure automatic denial
- Won't work for groups or aliases - only individual recipients
- Admin can restrict - may be limited to internal emails only
- No default setting - must manually request for each email
If you search "email read receipt Gmail" on Reddit, you'll find countless threads from frustrated users discovering these limitations. The consensus: Gmail's native read receipts are too restrictive for most use cases.
Outlook limitations
- Recipients can decline - or configure automatic denial
- Requires Microsoft 365 or Exchange - basic Outlook.com accounts have limited support
- New Outlook removed global defaults - manual selection required per message Cross-platform compatibility varies - depends on recipient's email client
- Some clients block receipts entirely - privacy-focused apps won't send them
Why recipients decline read receipts
Many professionals automatically decline because they view tracking as intrusive, don't want senders monitoring their email habits, or find the prompts annoying. Organizations may also have policies against sending receipts.
As Google's documentation states, you shouldn't rely on read receipts to certify delivery.
Read receipt not working: troubleshooting
Gmail: "Request read receipt" option not showing
This is the most common issue. The option won't appear if:
- You're using a personal @gmail.com account (not Google Workspace)
- Your administrator hasn't enabled read receipts
- Your admin restricted receipts to internal emails only
- You're using the Gmail mobile app (not supported)
Solution: Confirm you're using Google Workspace, contact your IT admin to verify settings, and use Gmail on desktop.
Gmail: Never receiving read receipts
You're requesting receipts but not getting confirmations.
Possible causes: Recipients are declining (many do by default), you're emailing external addresses when admin only allows internal, or you're sending to groups/aliases.
Solution: For reliable tracking without recipient consent, use a third-party tool like Superhuman Mail.
Outlook: Read receipts stuck in Outbox
Server connection issues can prevent receipts from sending.
Solution: Check for connection errors, verify your account settings, or contact your IT administrator.
Can you tell if an email has been read without a read receipt?
Native Gmail and Outlook require recipient consent. To track opens without approval, you'll need a tool that uses tracking pixels. These embed an invisible image that loads when the email opens, notifying you without the recipient's knowledge.
Keep in mind: privacy-focused recipients may block remote images, which prevents pixel tracking.
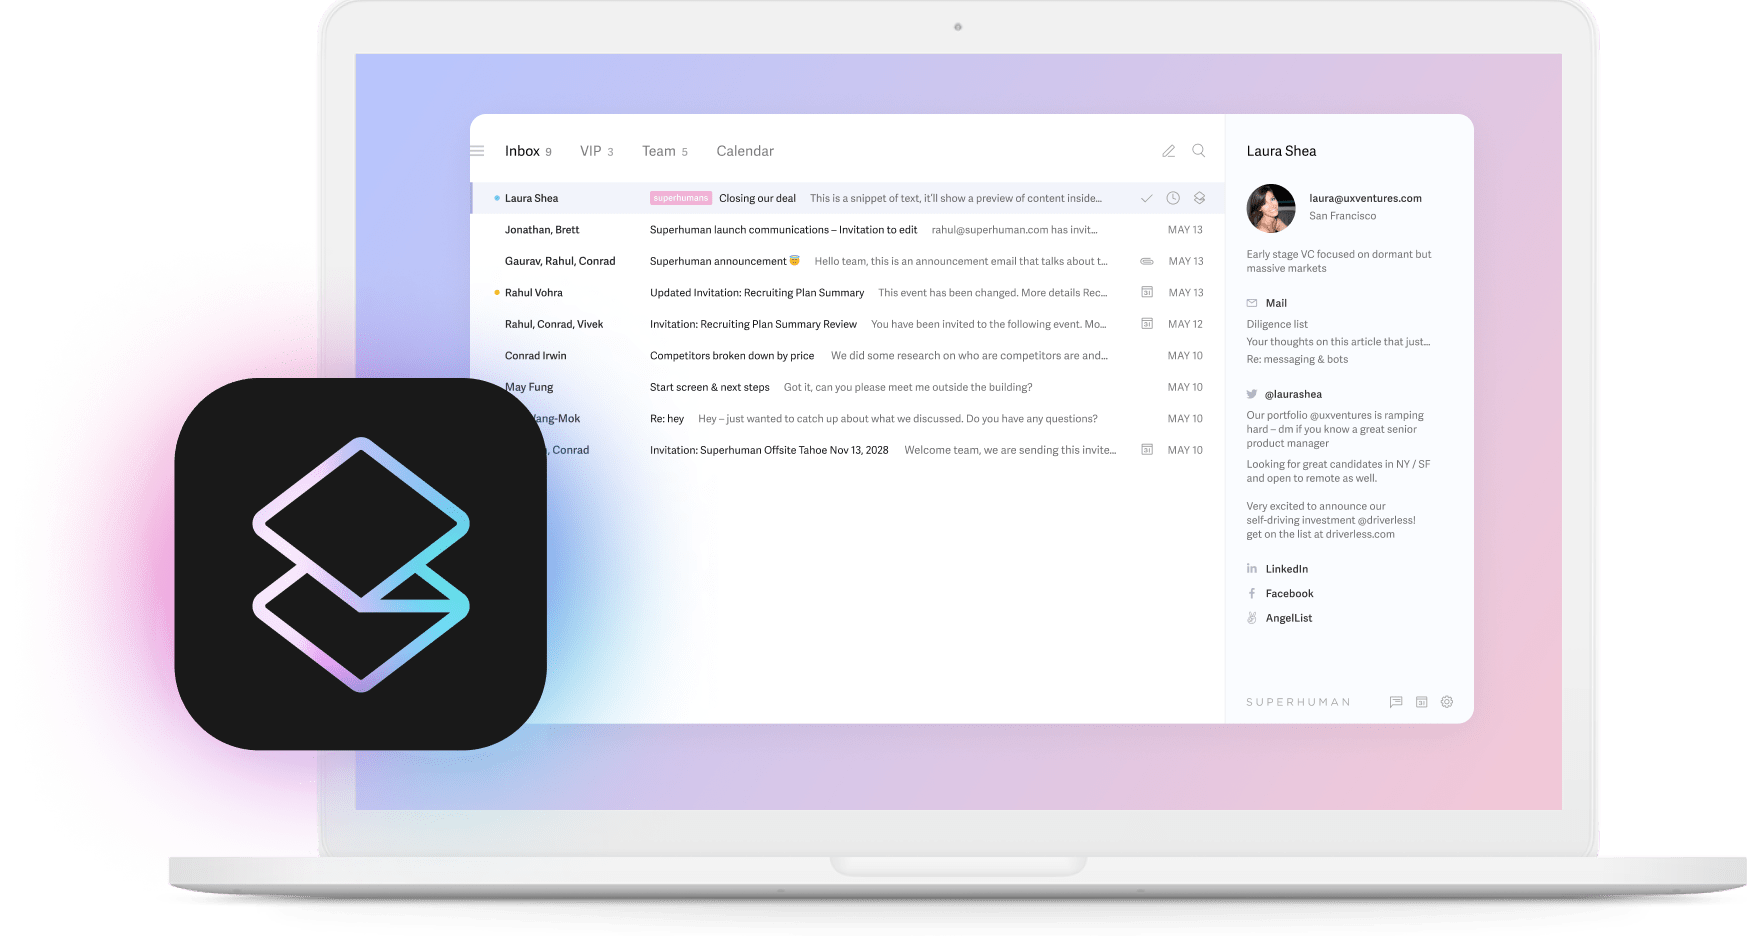
Superhuman Mail: A better alternative
If Gmail and Outlook read receipts aren't meeting your needs, Superhuman Mail offers built-in read status tracking that works across all devices - without the limitations of native features.
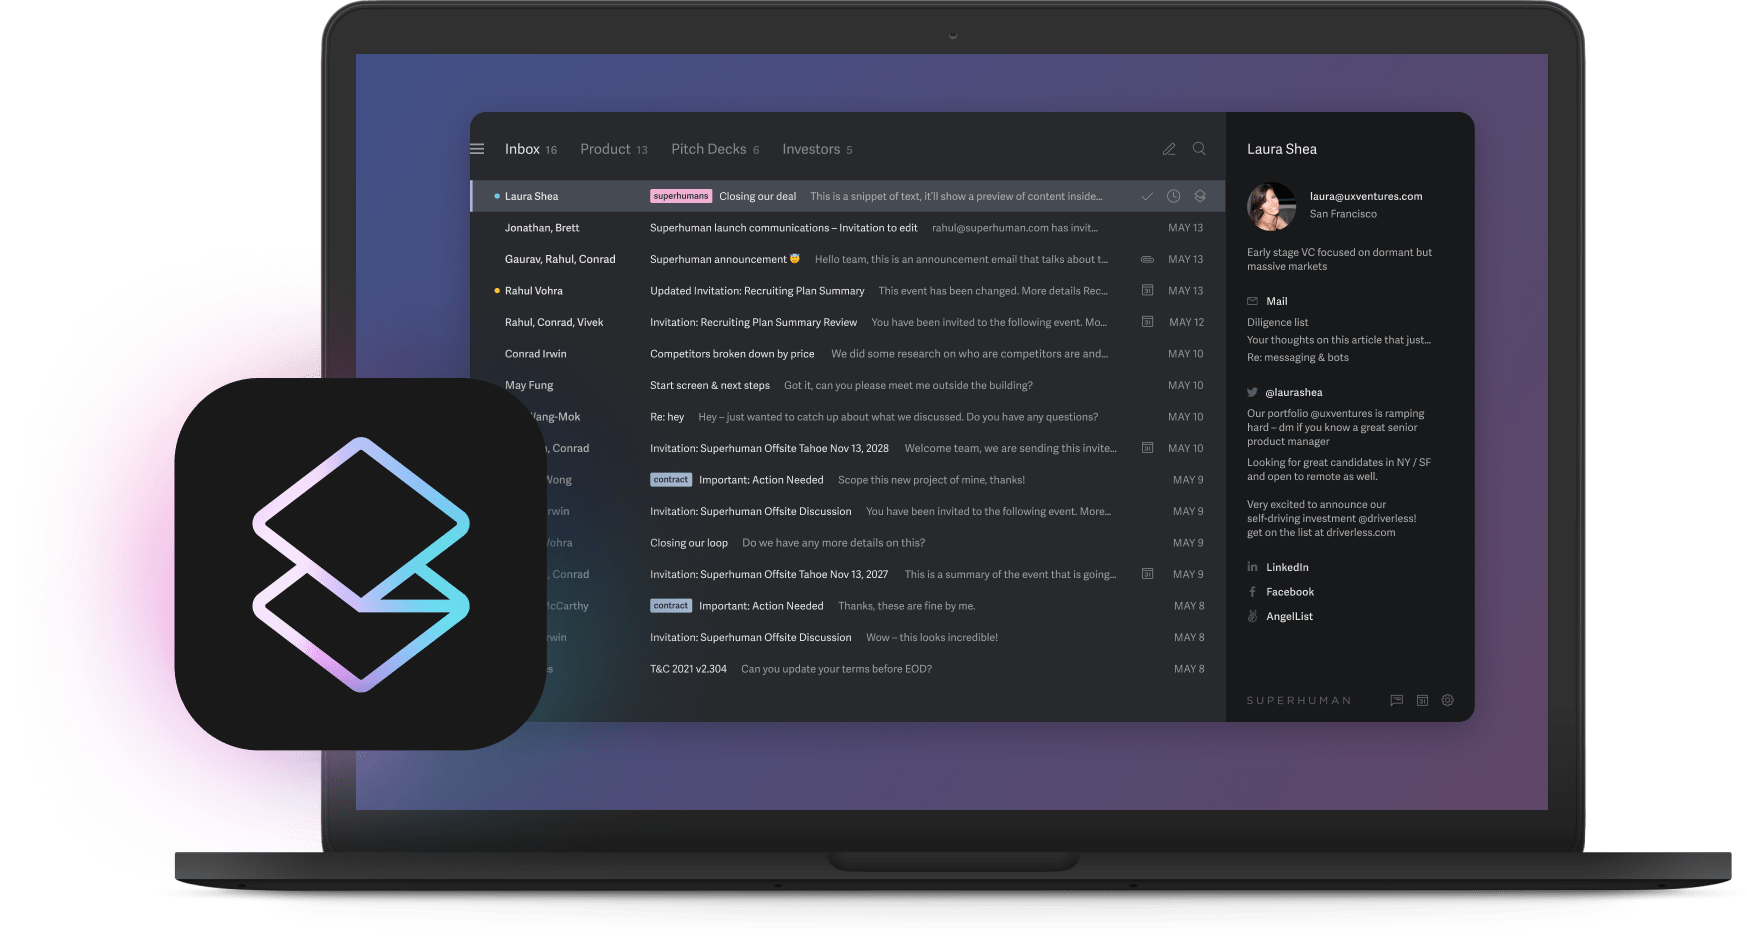
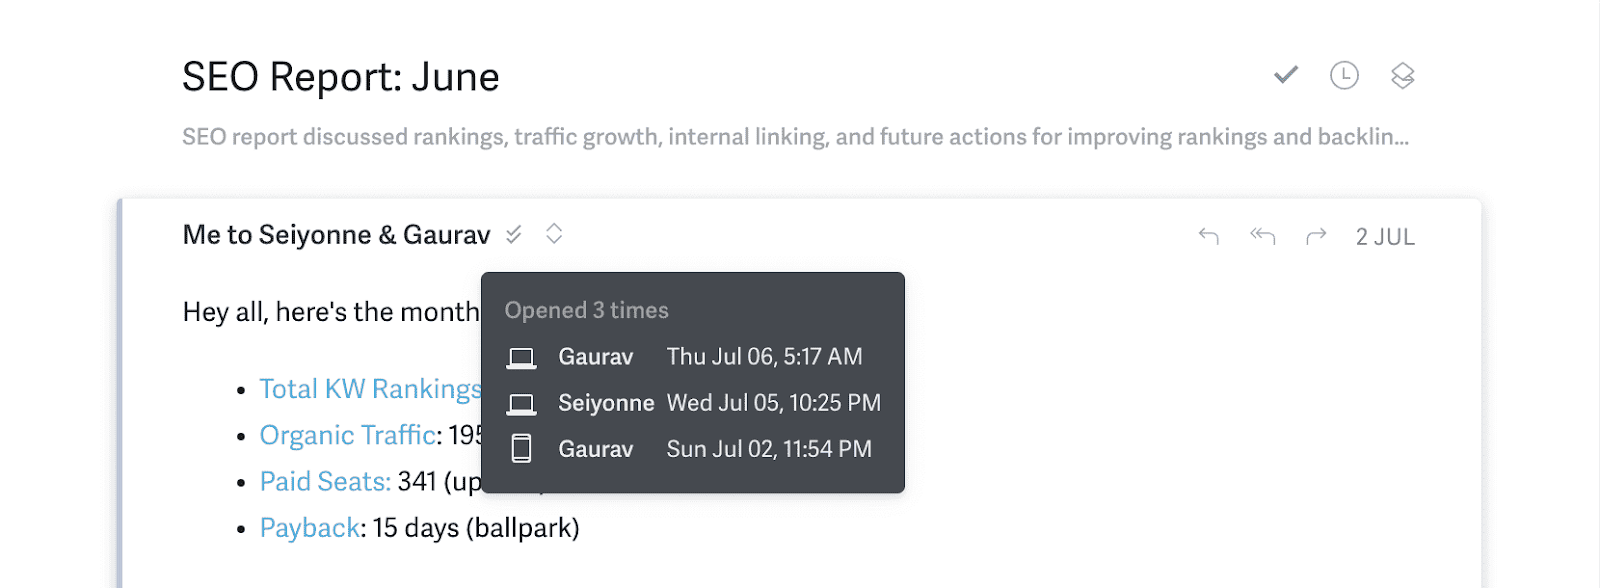
Here's what Read Statuses look like:
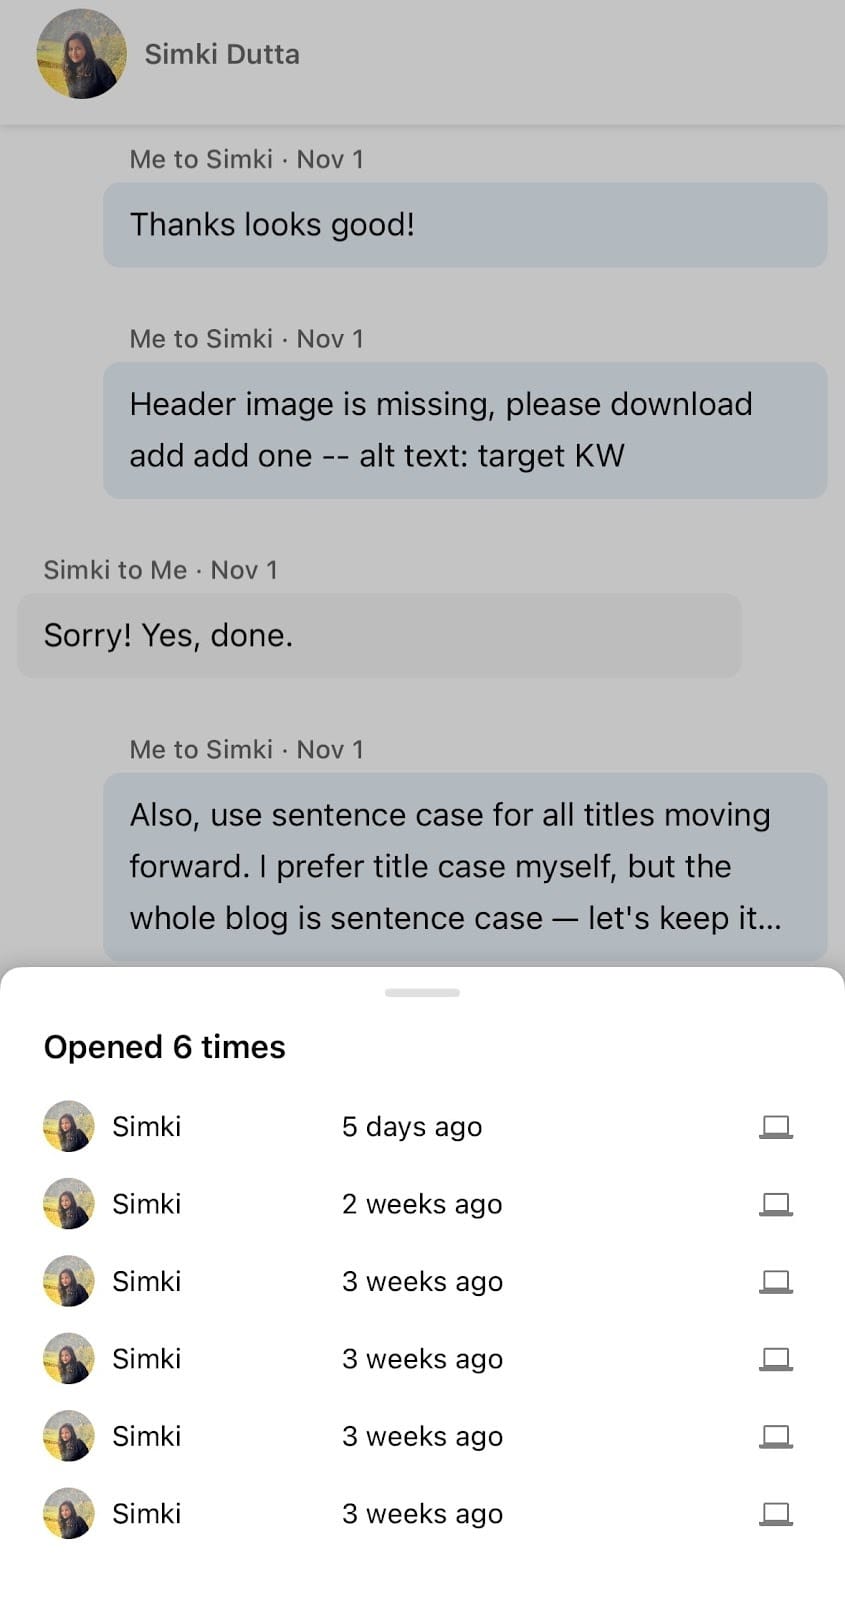
Unlike Gmail and Outlook, you can track multiple opens from different recipients on various devices, all on the same email:
How to enable Read Statuses in Superhuman Mail
By default, Read Statuses are turned off. To enable them:
- Press Cmd+K (or Ctrl+K on Windows)
- Type "read statuses"
- Press Return
You'll see a confirmation below your inbox:
Privacy-first tracking
Unlike other email trackers, Superhuman Mail prioritizes privacy:
- Read Statuses are opt-out by default
- No location information collected
- All historical location data deleted
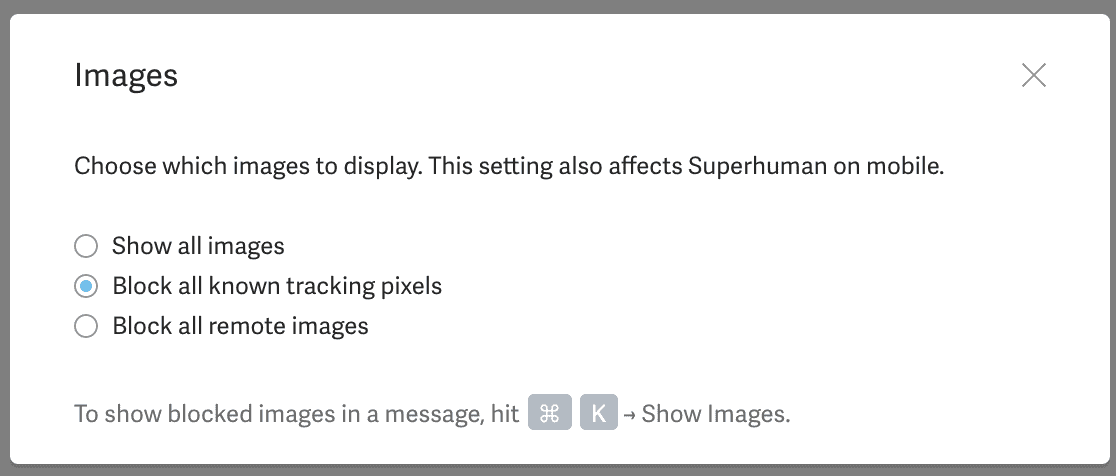
- Option to block all remote image loading
Don't want to be tracked yourself? Block all known tracking pixels:
Superhuman Mail for Teams
With Superhuman Mail for Teams, read statuses are shared across your organization. If a teammate emails a lead and CCs you, you can see when the lead reads it, how many times, and on which device.
Additional team features include:
- Team Reply Indicators: See when teammates are composing responses
- Recent Opens: Real-time feed of people opening your emails
Superhuman Mail helps teams save 4 hours per person weekly, respond 12 hours faster, and handle twice as many emails. Try it for a blazing-fast email experience.
Reduce distractions and save time with Superhuman Mail
Read Statuses, Keyboard Shortcuts, Undo Send, AI Triage, Beautiful Design
FAQs
How do I add a read receipt in Gmail?
First, your Google Workspace administrator must enable read receipts in the Admin console under Apps > Google Workspace > Gmail > User settings > Email read receipts. Once enabled, compose an email, click the three-dot menu at the bottom of the compose window, and select "Request read receipt." This feature isn't available for personal @gmail.com accounts or on the Gmail mobile app.
How do I add a read receipt in Outlook?
When composing an email, go to the Options tab and check "Request a Read Receipt." For Outlook Web, click the three-dot menu, select "Show message options," and check "Request a read receipt." On Outlook mobile (iOS/Android version 4.2437.0+), tap the + button and select the Receipts icon.
Can you tell if an email has been read without a read receipt?
Gmail and Outlook don't provide any native way to track opens without recipient consent. If someone declines your request, you won't know they read it. For tracking without approval, you'll need a tool like Superhuman Mail, Mailtrack, or Boomerang that uses invisible tracking pixels.
Why is my Gmail read receipt not working?
Common reasons: you're using a personal Gmail account (requires Google Workspace), your administrator hasn't enabled the feature, you're on the mobile app (not supported), or you're sending to groups/aliases (don't work with receipts). Contact your IT admin to verify settings.
Does the recipient know when I request a read receipt?
Yes. In both Gmail and Outlook, recipients see a prompt asking if they want to send a receipt. They can decline, and you won't receive any notification. Many professionals configure automatic denial of all requests.